Next JS & Open AI / GPT: Next-generation Next JS & AI apps

Don’t get left behind! Increase your value as a web developer today by learning how to integrate AI in to your projects!
This course uses the pages router but is currently going through an update to use the Next JS 14 and the app router. Expected release date is November / December 2023. Thank you for your patience.
Welcome to the exciting world of AI-powered, next-generation, Next JS apps!
In this course we will create a fictional Software-As-A-Service (SAAS) product called “BlogStandard”. We’ll build “BlogStandard” using a combination of Next.js, OpenAI’s GPT, MongoDB, Auth0, Stripe, and Tailwind CSS. BlogStandard allows users to create an account (handled by auth0), purchase tokens (handled by stripe), and spend those tokens to generate blog posts, powered by OpenAI’s GPT API. User’s tokens and generated blog posts will be stored using MongoDB.
In this comprehensive online course, you’ll learn how to harness the power of these cutting-edge technologies to build a fast, responsive, and dynamic web application that generates high-quality blog posts using AI. With step-by-step guidance, you’ll gain hands-on experience working with each of these technologies to bring your vision to life.
First, we’ll dive into Next.js, a popular framework for building web applications. You’ll learn how to create fast and responsive pages, manage routing, and integrate APIs to build a powerful and dynamic web application.
Next, we’ll explore OpenAI’s GPT, the state-of-the-art language generation model, and learn how to use it to generate high-quality blog posts. You’ll also discover how to integrate MongoDB, a scalable and flexible NoSQL database, to store and manage data for our application.
In addition, you’ll learn how to use Auth0, a powerful identity management platform, to handle user authentication and authorization, and Stripe, a leading payment processor, to handle transactions and payment processing. Finally, you’ll learn how to use Tailwind CSS, a modern CSS framework, to style and design your application, bringing your vision to life.
By the end of this course, you’ll have the skills and knowledge you need to build your own AI-powered app and unleash the full potential of AI in your web development projects. So what are you waiting for? Join now and start your journey to the exciting world of AI-powered Next JS apps!
Introduction & project setup
The instructor welcomes the learners to the JS and Open AI course, where they will be building a fictional software as a service product called Blog Standard. Blog Standard is a basic SaaS product that allows users to purchase tokens, which they can redeem to generate SEO-friendly blog posts using Open AI. The course covers everything needed to build a SaaS product, including using Next.js for the front and back end, Tailwind CSS for styling, Auth0 for handling user accounts, MongoDB for data storage, Stripe for payments, and OpenAI GPT API for generating blog posts.
The instructor provides a quick demo of the app, starting with the landing page and signing up for the Blog Standard app. Users need to purchase tokens to generate blog posts, and Stripe handles the payments. Once the payment is successful, the user can generate a new blog post using targeted keywords, and Open AI generates the content. The generated post is SEO-friendly, with a title, meta description, targeted keywords, and content.
The instructor recommends connecting with them on LinkedIn and joining the WebDevEducation Facebook group. The last lecture contains all the links necessary to connect with the instructor. The instructor looks forward to kicking off the course in the next lecture by setting up the Next.js project. This course is a great opportunity to learn how to build a SaaS product and covers all the essential features needed to do so.
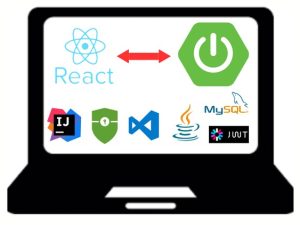
In this lecture, the instructor explains how to set up the Next JS project for the course. He has already created a starter repo containing the minimum necessary to quickly set up the project. The starter repo includes a set of npm packages that will be used throughout the course, Tailwind CSS setup, and boilerplate code to connect to MongoDB. The boilerplate code for MongoDB is taken directly from the MongoDB documentation. The instructor uses Visual Studio Code as the editor and creates a new next app based on the starter repo using the integrated terminal within Visual Studio Code. He specifies the name of the project and the repo URL. Once the installer has finished, he navigates to the new directory and opens the project in Visual Studio Code.
The instructor explains that he has added several packages to the project, including Auth0 for logins and registrations, font awesome, MongoDB, numeral for formatting numbers, OpenAI for generating blog posts, and Stripe for payments. He has also included Tailwind CSS, and the Tailwind configs. The final CSS build for the project is generated from the globals CSS file, which is imported within the pages and _app.js. Additionally, the instructor has included a favicon PNG in the public directory, which will be used as the Blog Standard logo. Finally, he has included the boilerplate file and code for MongoDB in the lib directory, which comes directly from the MongoDB documentation.
The instructor then runs the project to ensure it is set up correctly and moves on to discuss the first pages in the next lecture.
Authentication & authorization with Auth0
Creating the app layout with Tailwind CSS
Generate blog posts with OpenAI's GPT API and store in MongoDB
Implementing stripe payments
Styling updates, fixes, and data validation
Implement "load more posts" and delete post
Deploy
Productivity Hacks to Get More Done in 2018
— 28 February 2017
- Facebook News Feed Eradicator (free chrome extension) Stay focused by removing your Facebook newsfeed and replacing it with an inspirational quote. Disable the tool anytime you want to see what friends are up to!
- Hide My Inbox (free chrome extension for Gmail) Stay focused by hiding your inbox. Click "show your inbox" at a scheduled time and batch processs everything one go.
- Habitica (free mobile + web app) Gamify your to do list. Treat your life like a game and earn gold goins for getting stuff done!
Related Courses